Printing
Troubleshooting Printer Issues
Issue: When trying to print the Print Queue window appears. The print job says "Hold for Authentication" but it never finishes.
Solution: This is usually a result of outdated NetID credentials. If you recently changed the password for your U of I NetID, you also need to update the password on your computer for the print server.
On a Windows computer, bring up the "Run" program and enter the address for the print server just like you did when setting it up. This should prompt you to enter your credentials again.
On a Mac you will need to click on the magnifying glass in the upper right-hand corner to bring up the "Finder" menu. Type in "Keychain Access" to get access to the Mac keychain. In the search field type in "print1" to find the listing for the print server. Double lick to bring up the info. Click the "Show Password" checkbox and in the field enter your new password. Click "Save" when you are finished.
In either case, the print job in the queue that says "Hold for Authentication" will never finish. You will need to delete the job and print the document again.
Issue: When trying to print, everything seems successful from the computer, but nothing comes out of the printer.
Solution: This is usually a result of being out of print pages. If you have no print pages left on your account, the print job will clear the computer without issue but will not be printed.
To check the status of your print pages log into help.uidaho.edu. Click on the "Print Pages" tab on the left, and then the "Print Pages" link. When the page loads, there should be a pop up box that shows how much money and how many pages you have left. If it says "0.00" you will need to add more. You can click on the "+ Add Pages" button at the top to add more pages to your account.
Windows Printer Setup
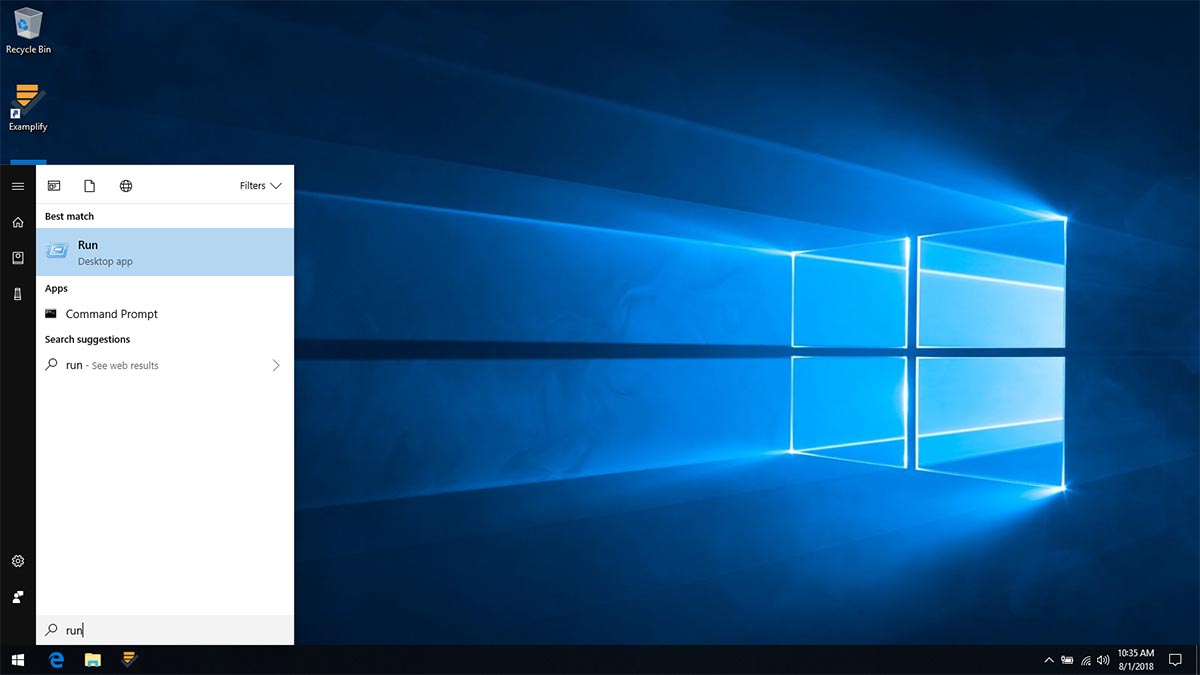
- Open the "Start" menu and type "run" and select the "Run" program from the list.
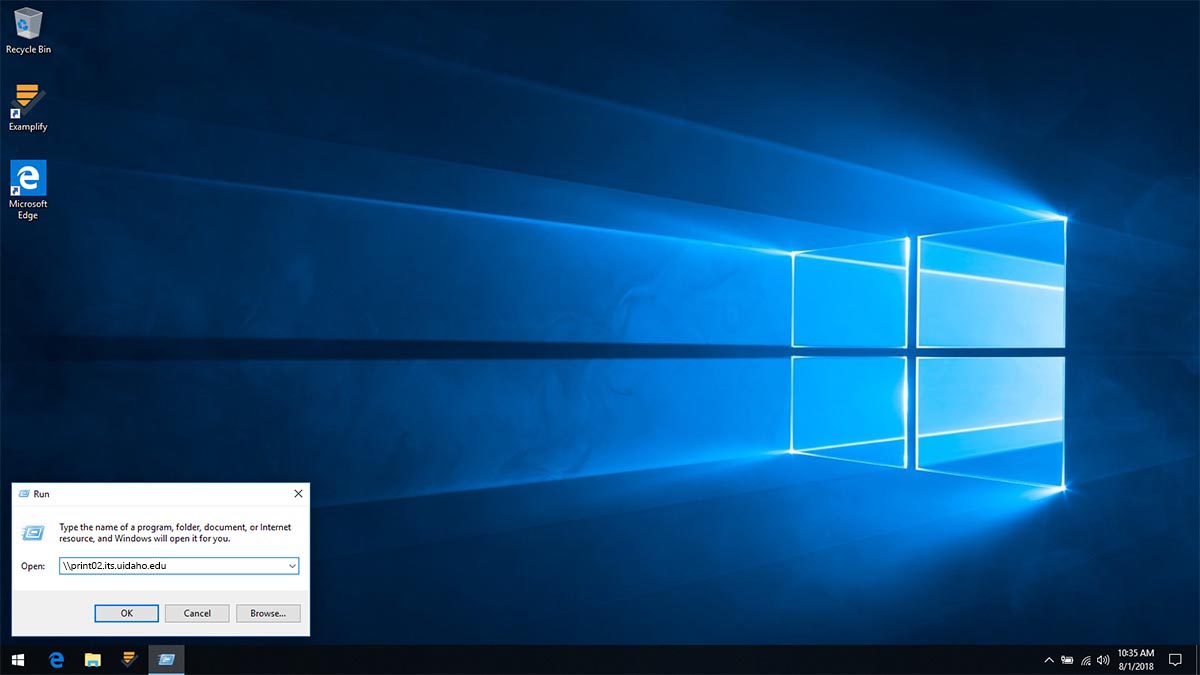
- In the "Run" window type the following: \\print02.its.uidaho.edu Then click "OK"
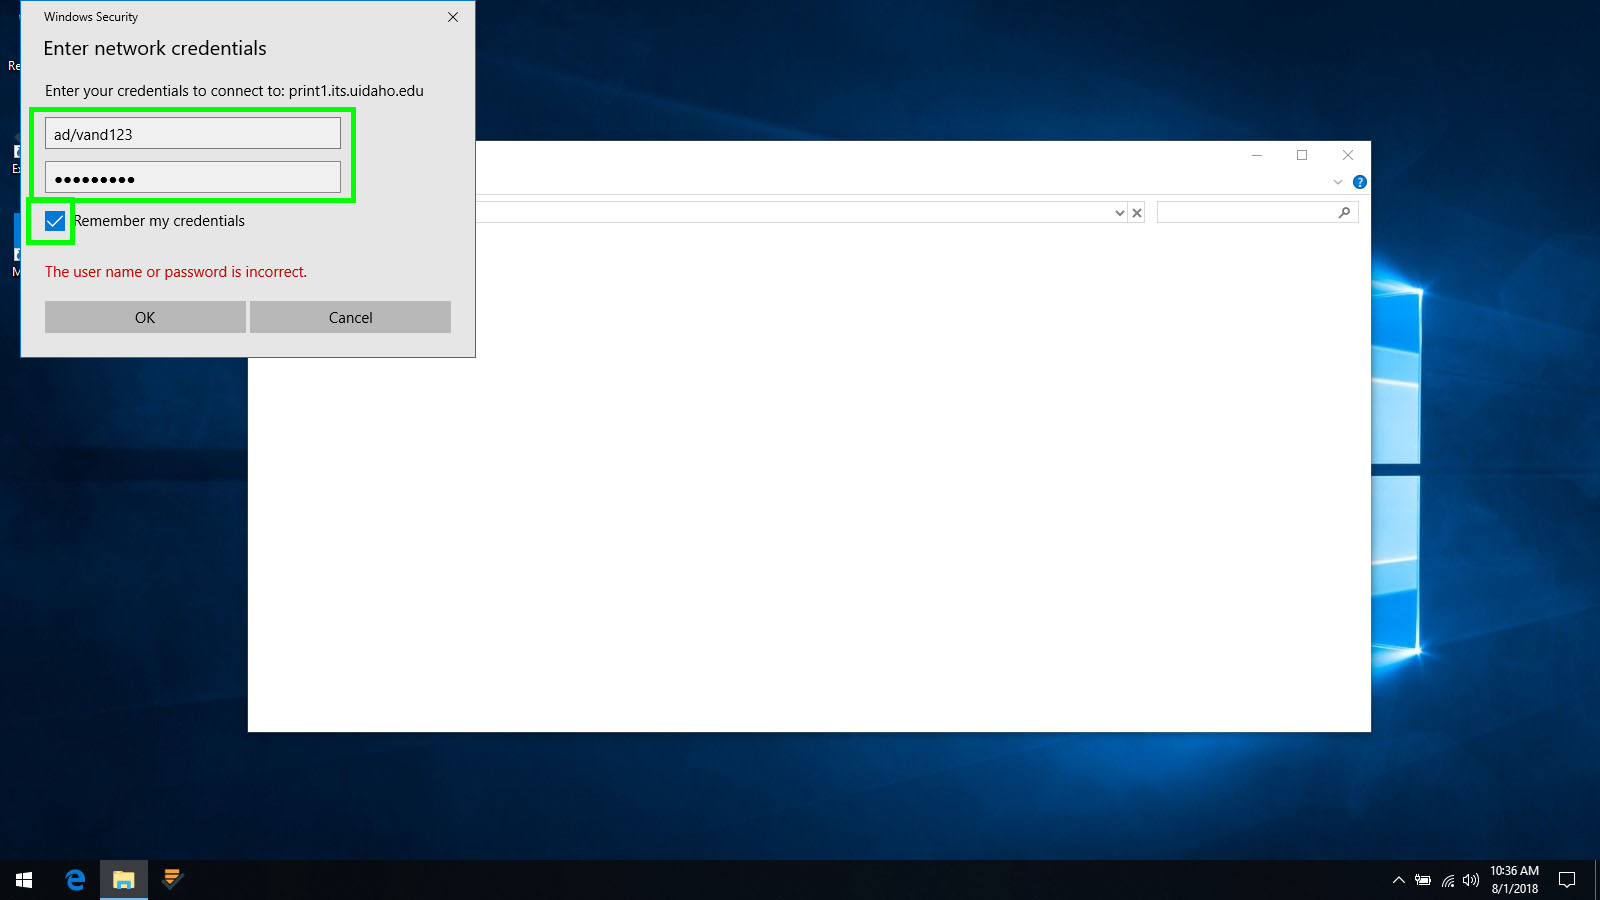
- In the dialogue box that appears enter your U of I NetID and password, and check the box for "Remember my credentials" to keep from being asked to log in every time you print. Be sure to type "ad\" before the username. (e.g. ad\vand1234)
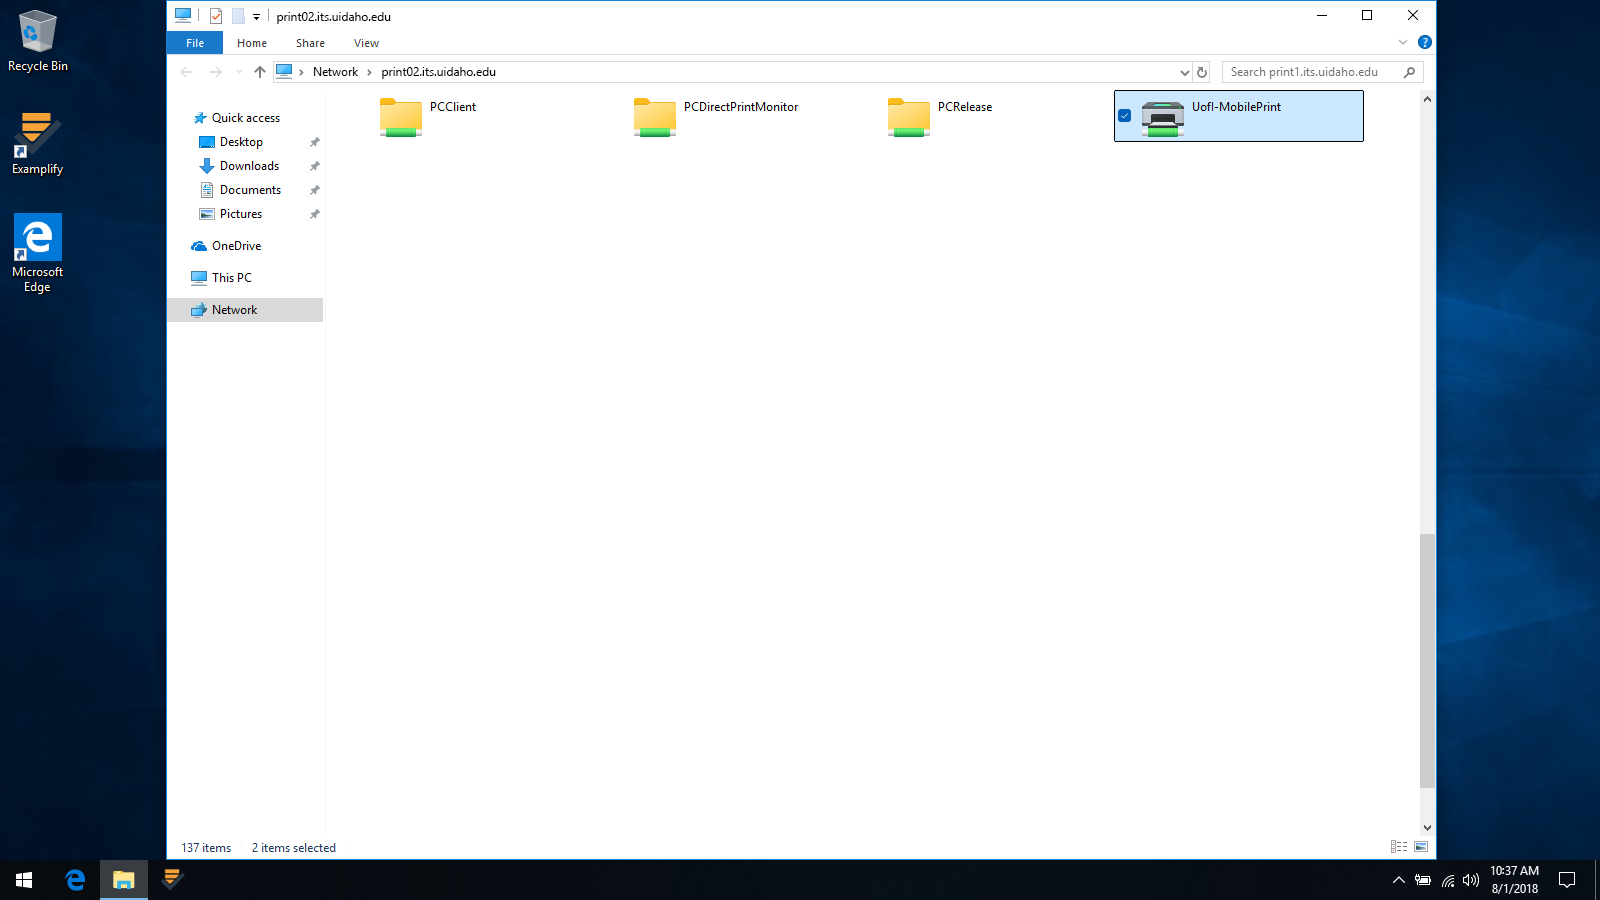
- A window will appear with a list of available printers to connect to. Select the UofI-MobilePrint. Double click to run the setup. It may take a few seconds for the server to respond and begin the setup. Be patient.
- When sending print jobs to UofI-MobilePrint, you will need to release the job from the printer you want it to print from. To do this you can scan the QR code on the printer with your phone and release it from the web or use the keypad next to the printer. Press the enter key, enter your V# and press enter again to release your print job.


Mac Printer Setup
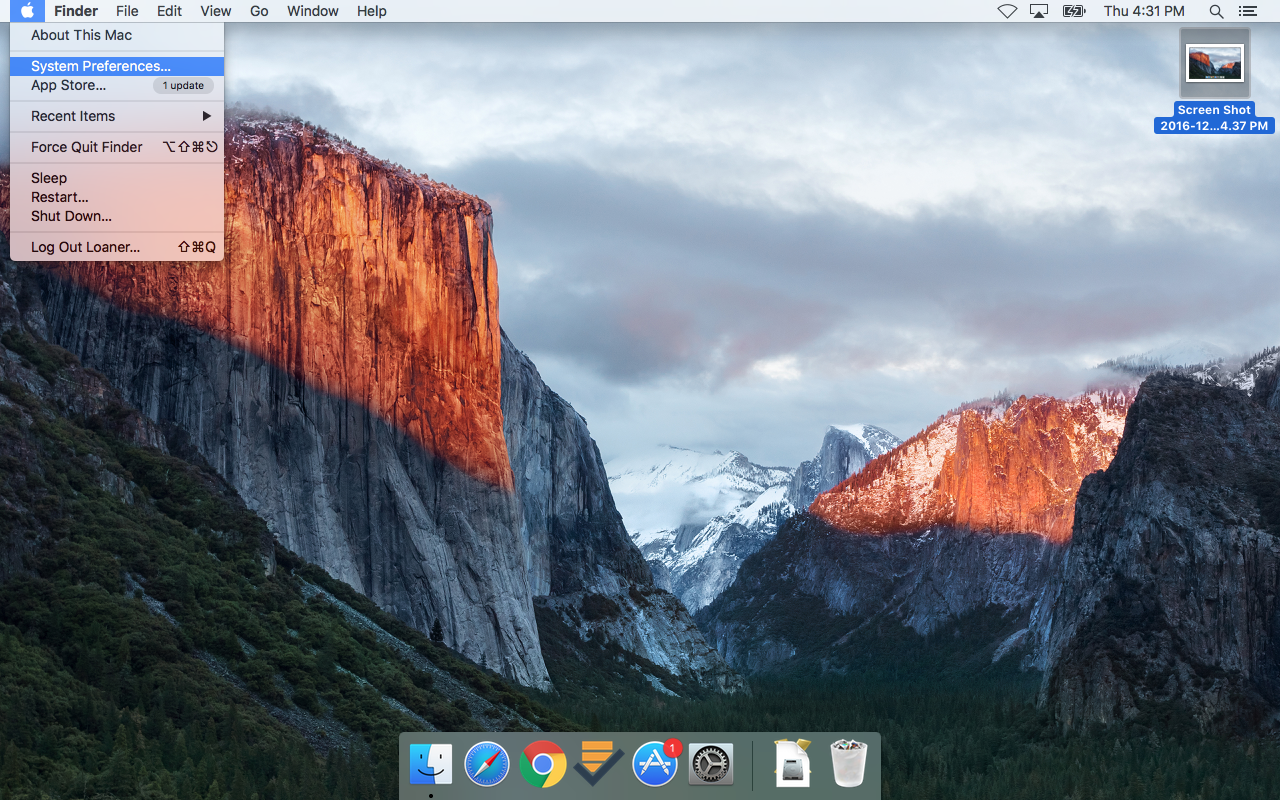
- Click the Apple icon in the upper left hand corner of the desktop and select "System Preferences" from the drop down.
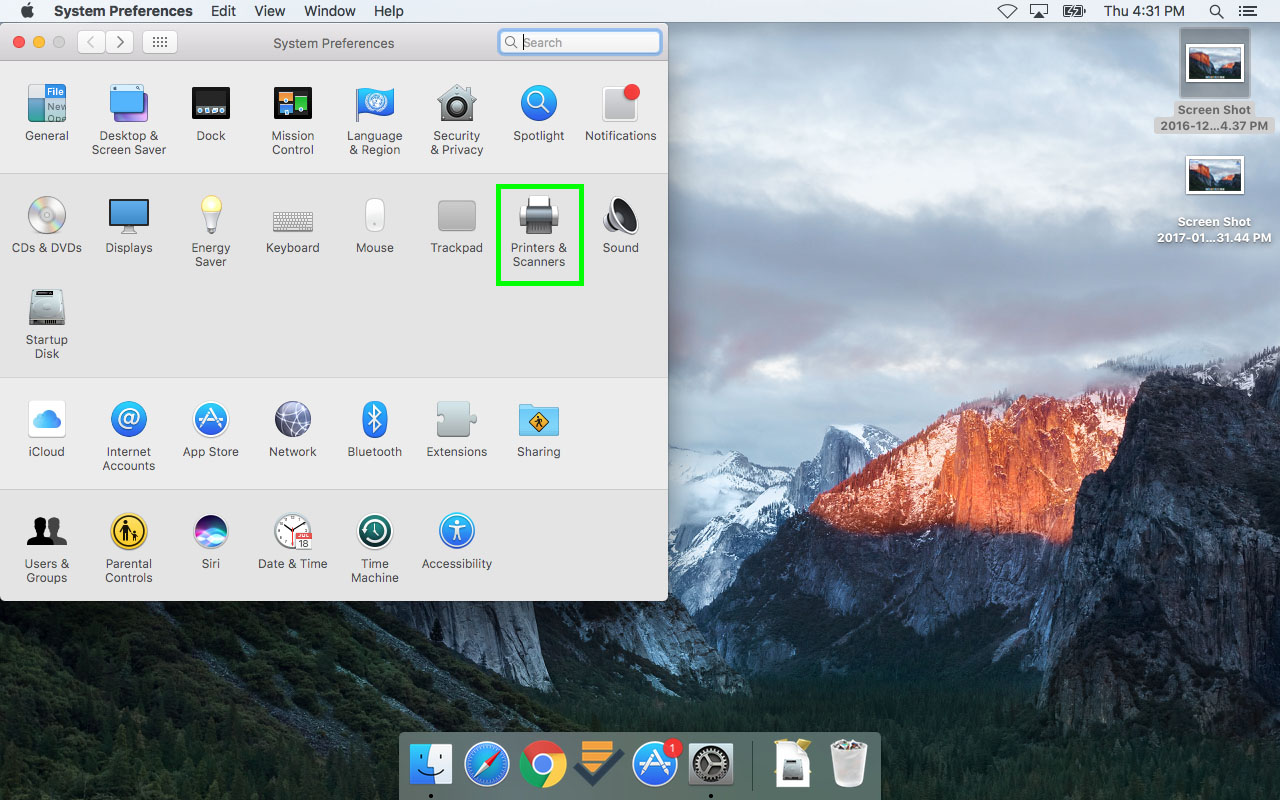
- Double click on the "Printers and Scanners" icon.
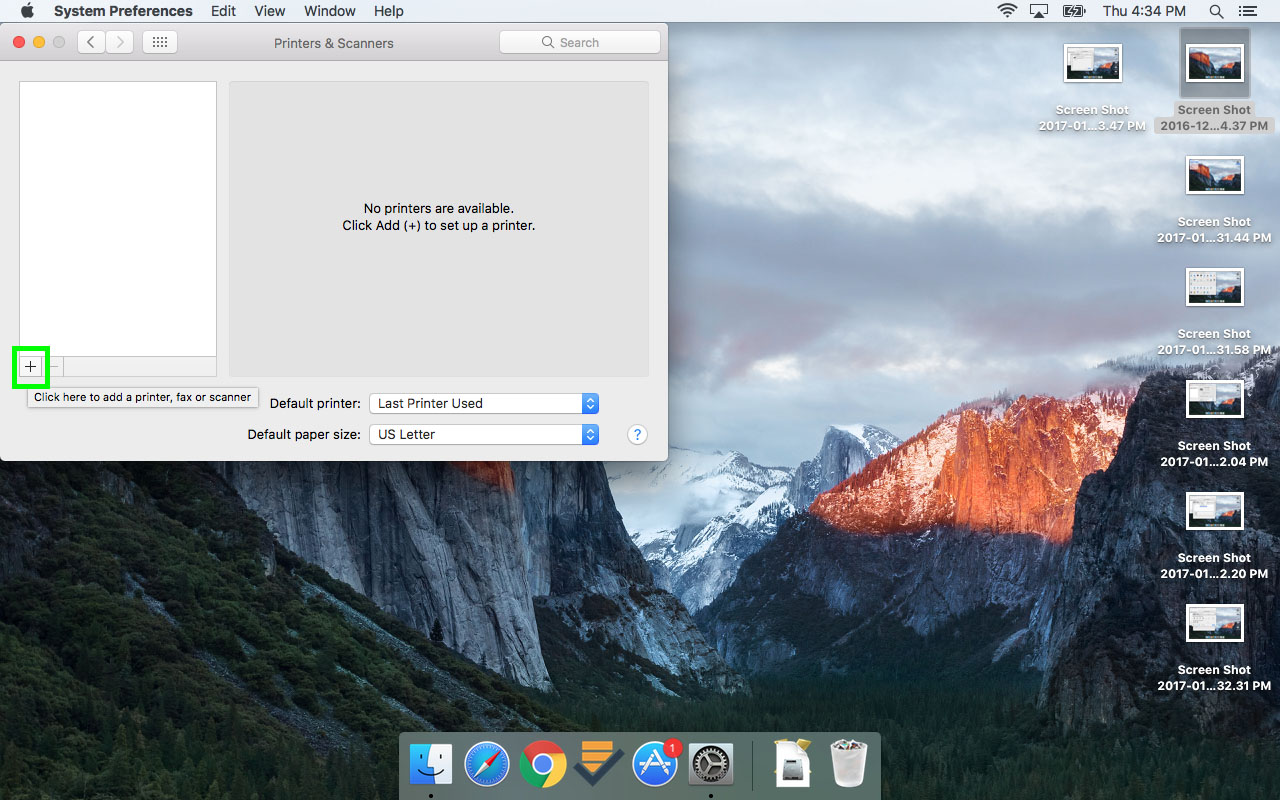
- To add a printer click the "+" icon under the list of printers.
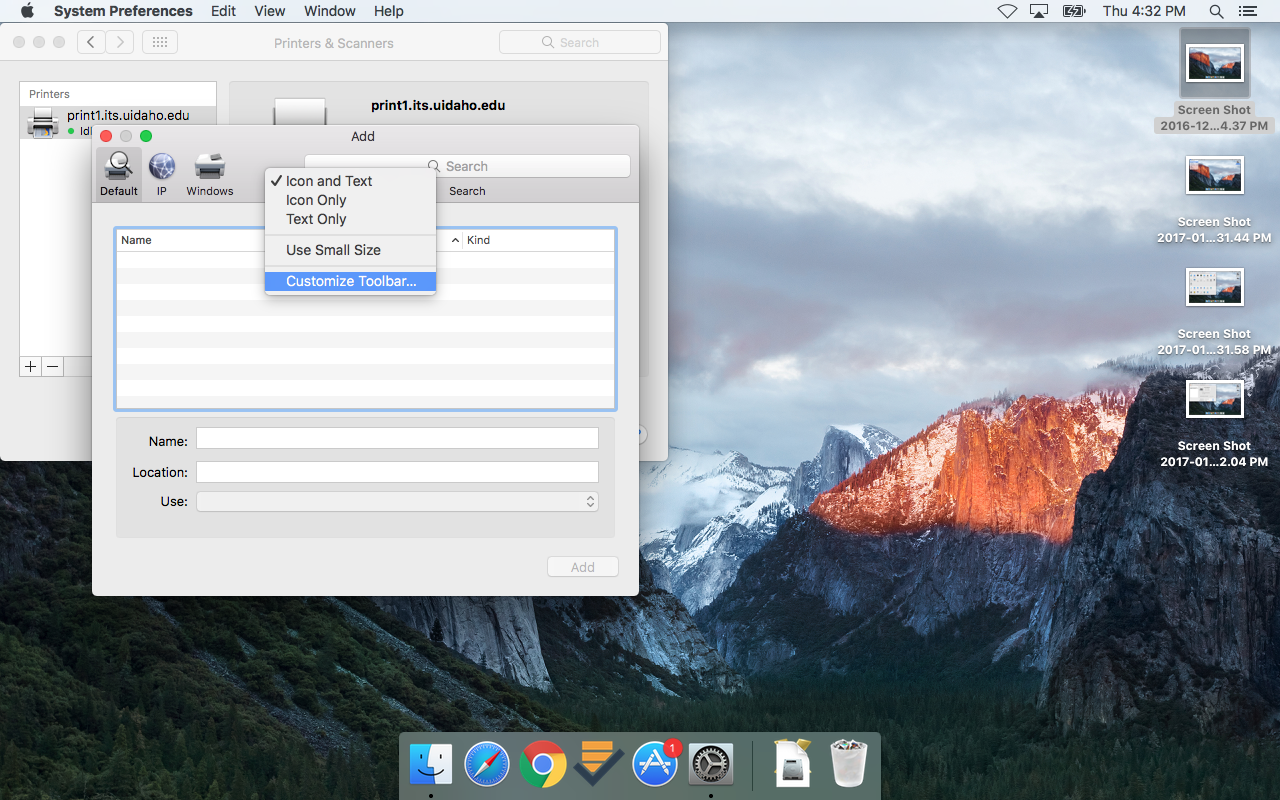
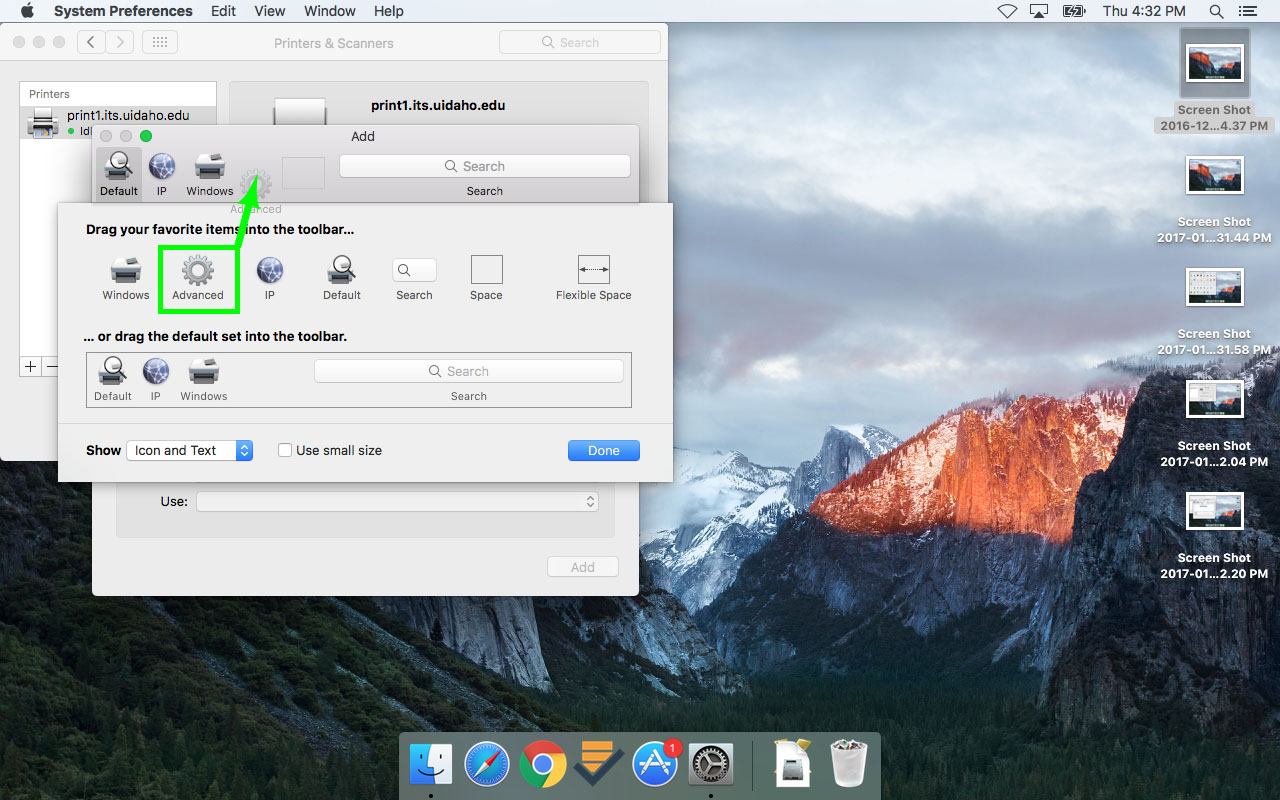
- In the window that appears, if you do not see the "Advanced" icon, right click on an empty part of the toolbar and select "Customize Toolbar" from the drop down.
- Click and drag the "Advanced" icon from the window that appears to a spot on the toolbar. then click the "Advanced" Icon.
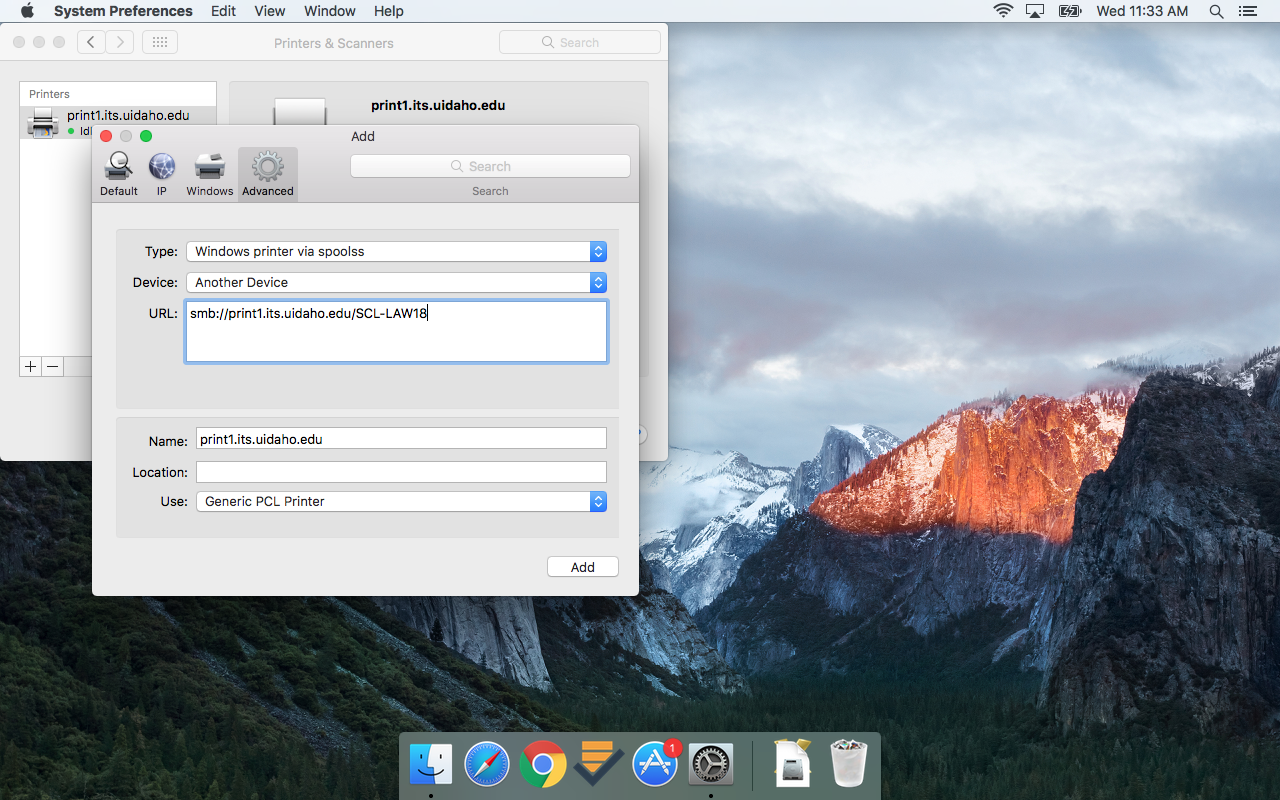
- In the window that appears select "Windows printer via spools" from the "Type" drop down.
- In the "URL" field enter the following address.
- smb://print02.its.uidaho.edu/UofI-MobilePrint
- Under the "Use" drop down select the "Generic PostScript Printer" option.
- Click "Add"
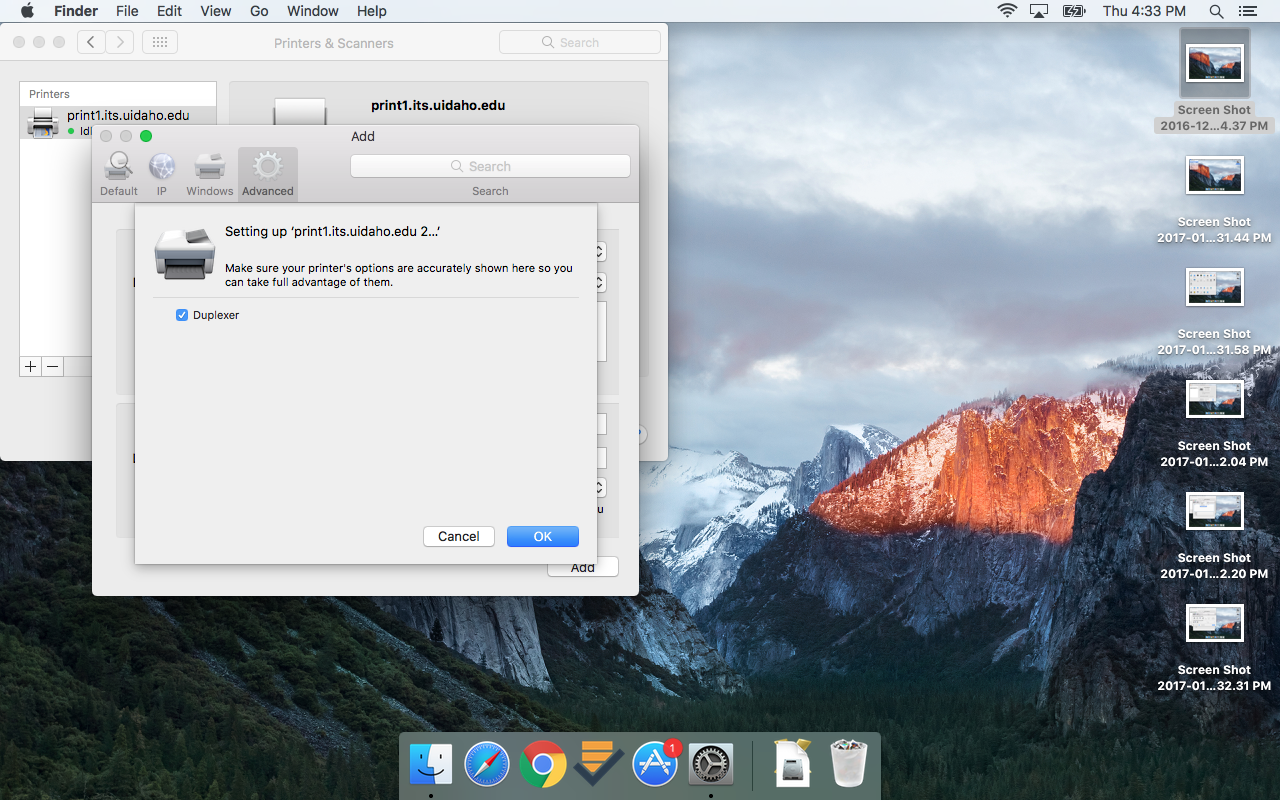
- In the next window, check the box for the "Duplexer". This will enable two-sided printing.
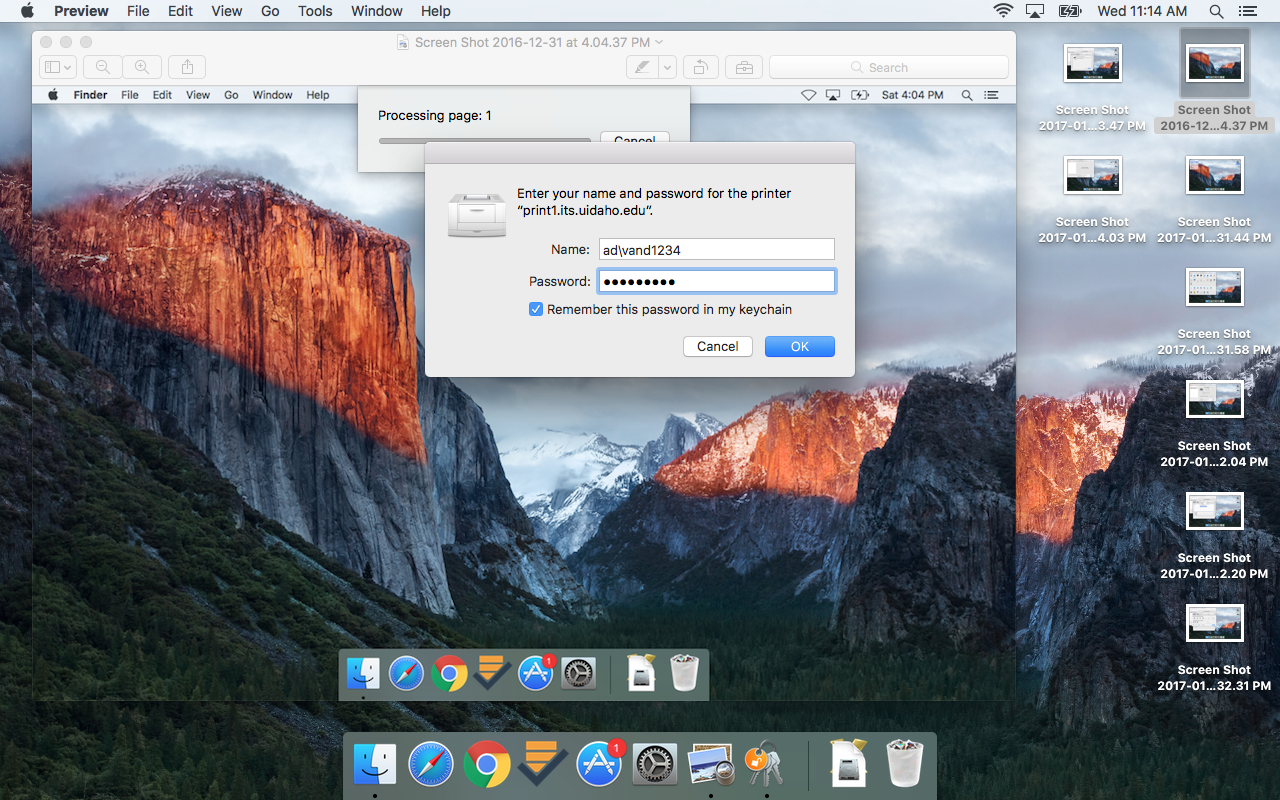
- The first time you print from this printer you will be asked to log in. Enter your U of I NetID and password, and check the box for "Remember this password in my keychain" to keep from being asked to log in every time you print . Be sure to type "ad\" before the username. (e.g. ad\vand1234)
- When sending print jobs to UofI-MobilePrint, you will need to release the job from the printer you want it to print from. To do this you can scan the QR code on the printer with your phone and release it from the web or use the keypad next to the printer. Press the enter key, enter your V# and press enter again to release your print job.


